Adding a User
Administrators can create user accounts directly from the User section of MagicINFO Server. Each account belongs to an organization and a user group, and its role determines which parts of the server the user can access.
Create the account
-
Sign in to the MagicINFO Server web interface.
-
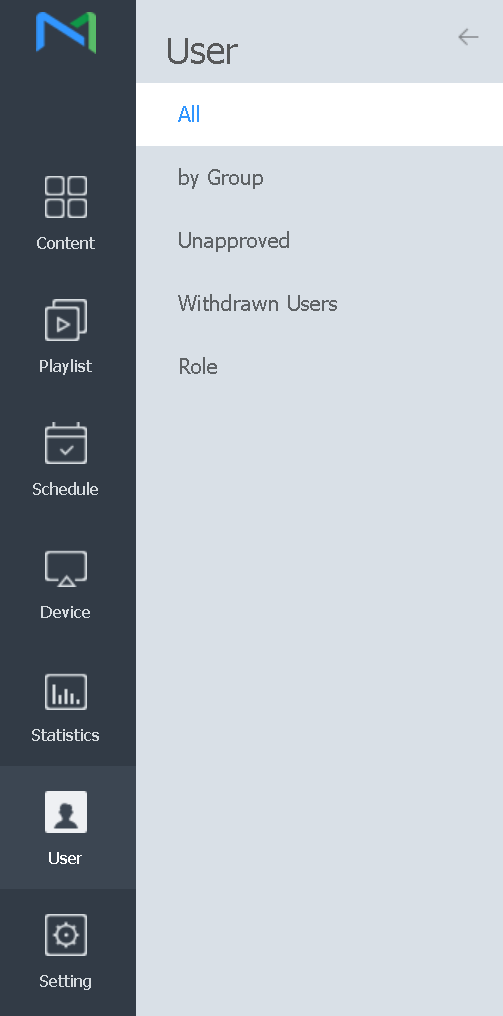
Click User in the menu bar on the left side of the screen.
-
The user list shows the accounts that already exist. Click Add User above the list.

-
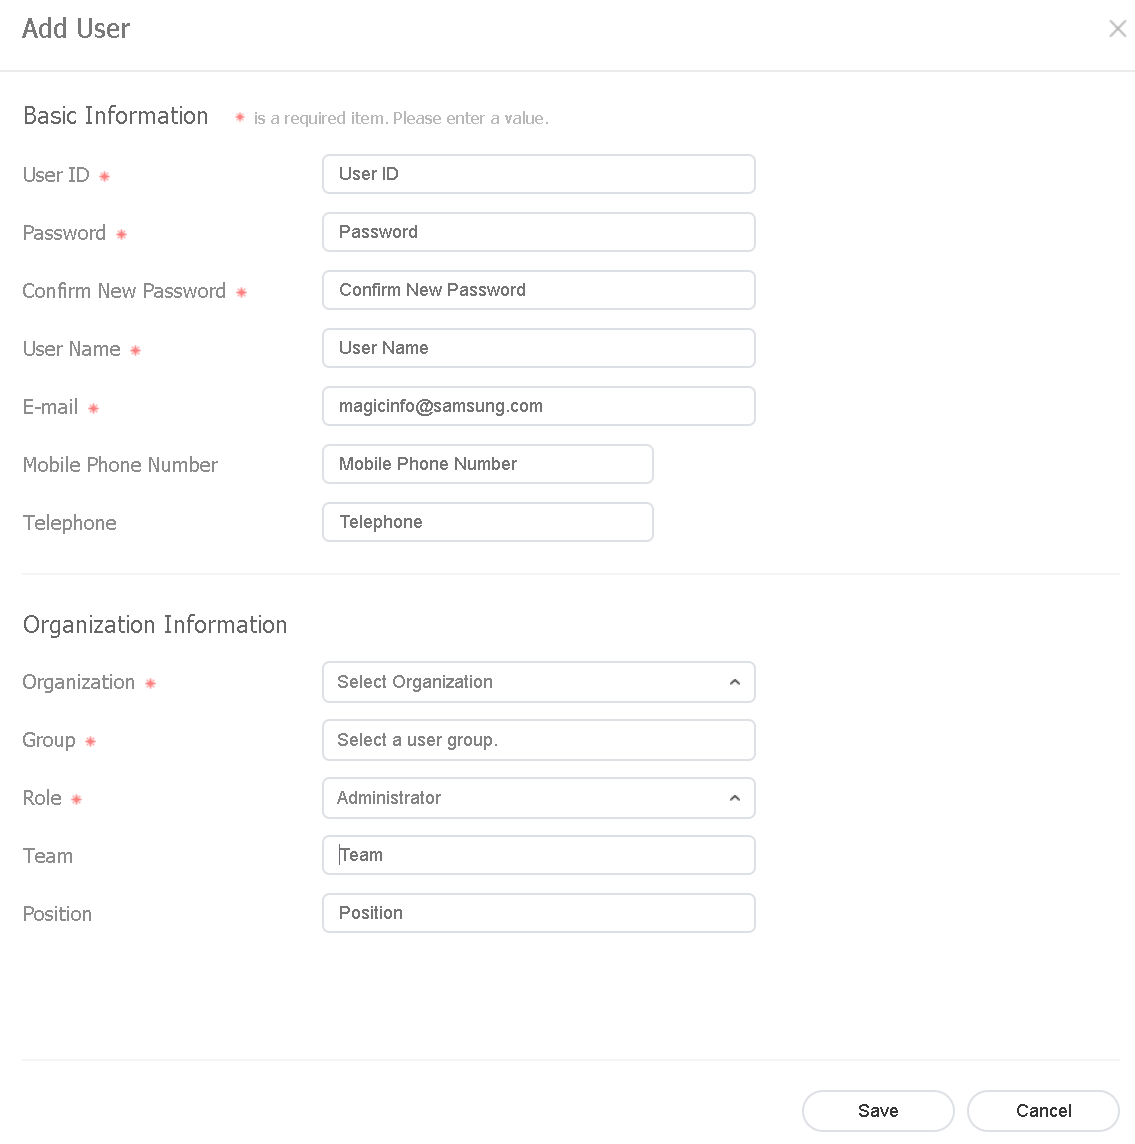
Complete the Add User dialog. Fields marked with an asterisk are required:
- Basic Information — user ID, password (entered twice), user name, and e-mail address. A mobile phone number and telephone number are optional.
- Organization Information — the organization, user group, and role for the account. Team and position are optional.
-
Click Save. The new account appears in the user list.
Built-in roles
The role assigned in the Add User dialog controls what the account is authorized to do:
| Role | Authorization |
|---|---|
| Administrator | Manages all matters of the organization. |
| Content Manager | Accesses and manages the content-related menus. |
| Content Schedule Manager | Retrieves and manages content and schedules. |
| Content Uploader | Creates content and playlists. |
| Device Manager | Accesses and manages the device-related menus. |
| Schedule Editor | Creates and edits content schedules and message schedules. |
| Schedule Manager | Accesses and manages the schedule-related menus. |
| User Manager | Accesses and manages the user-related menus. |
Custom roles can also be defined and assigned. See Managing roles for details, and Approve or Reject New User Sign-ups for how self-registered accounts are approved.