Using Frames in Schedules
Frames divide the screen of a display into separate zones, each playing its own content — for example, a main video area with a news ticker underneath. Frames are configured inside a content schedule.
Only individual content items can be scheduled in a frame. Playlists cannot be assigned to frames.
Create the schedule
Sign in to the MagicINFO Server web console and go to Schedule > New Schedule > Content.
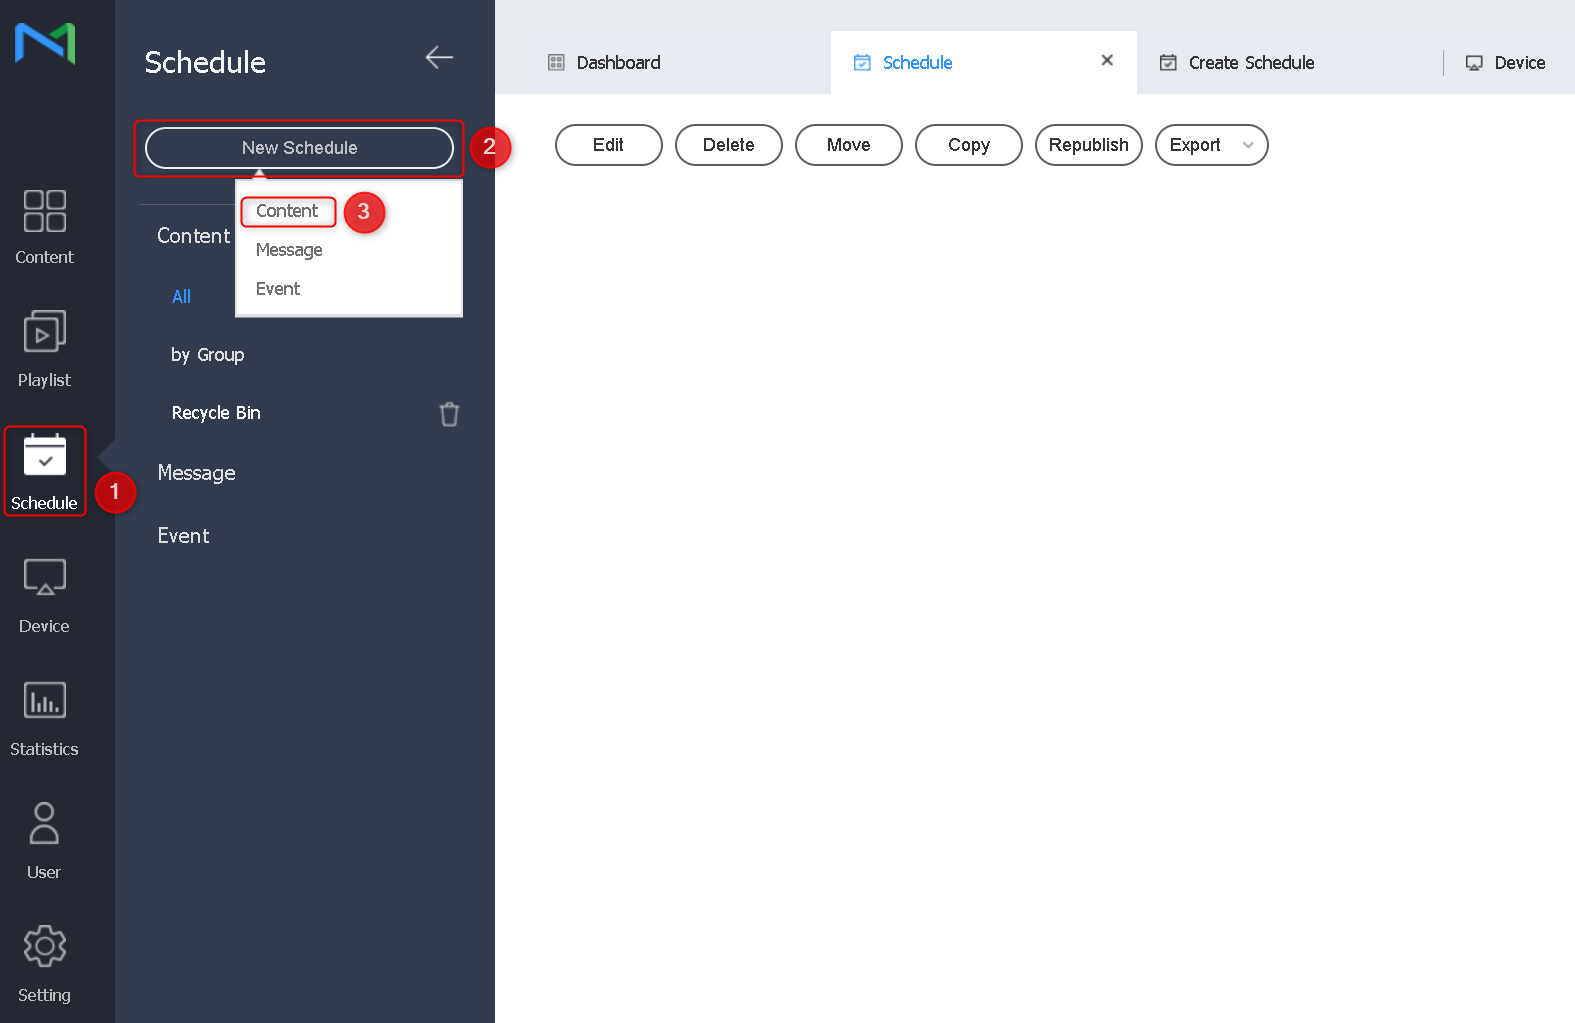
In the pop-up, select the supported device type, keep the Schedule Type set to General, and click Create.
Open the frame editor
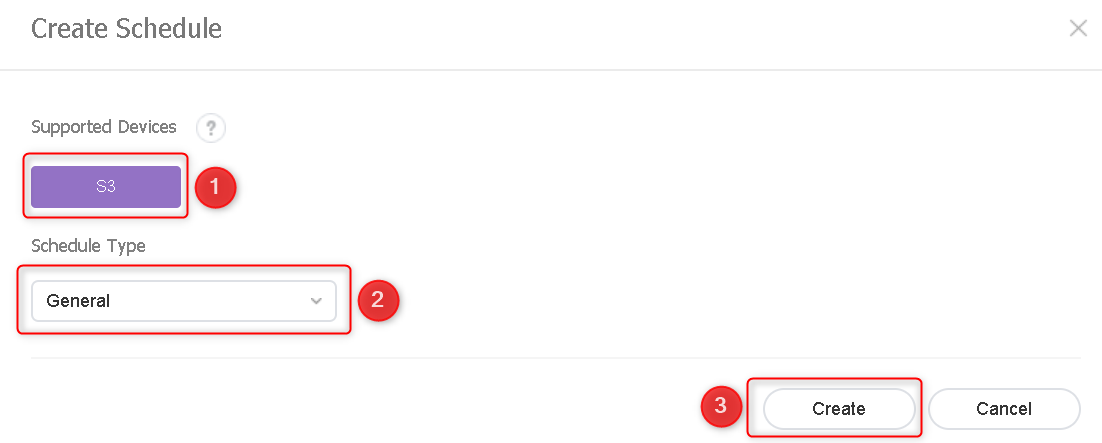
In the schedule editor, click Edit Frame in the upper-right corner.
Choose a frame layout
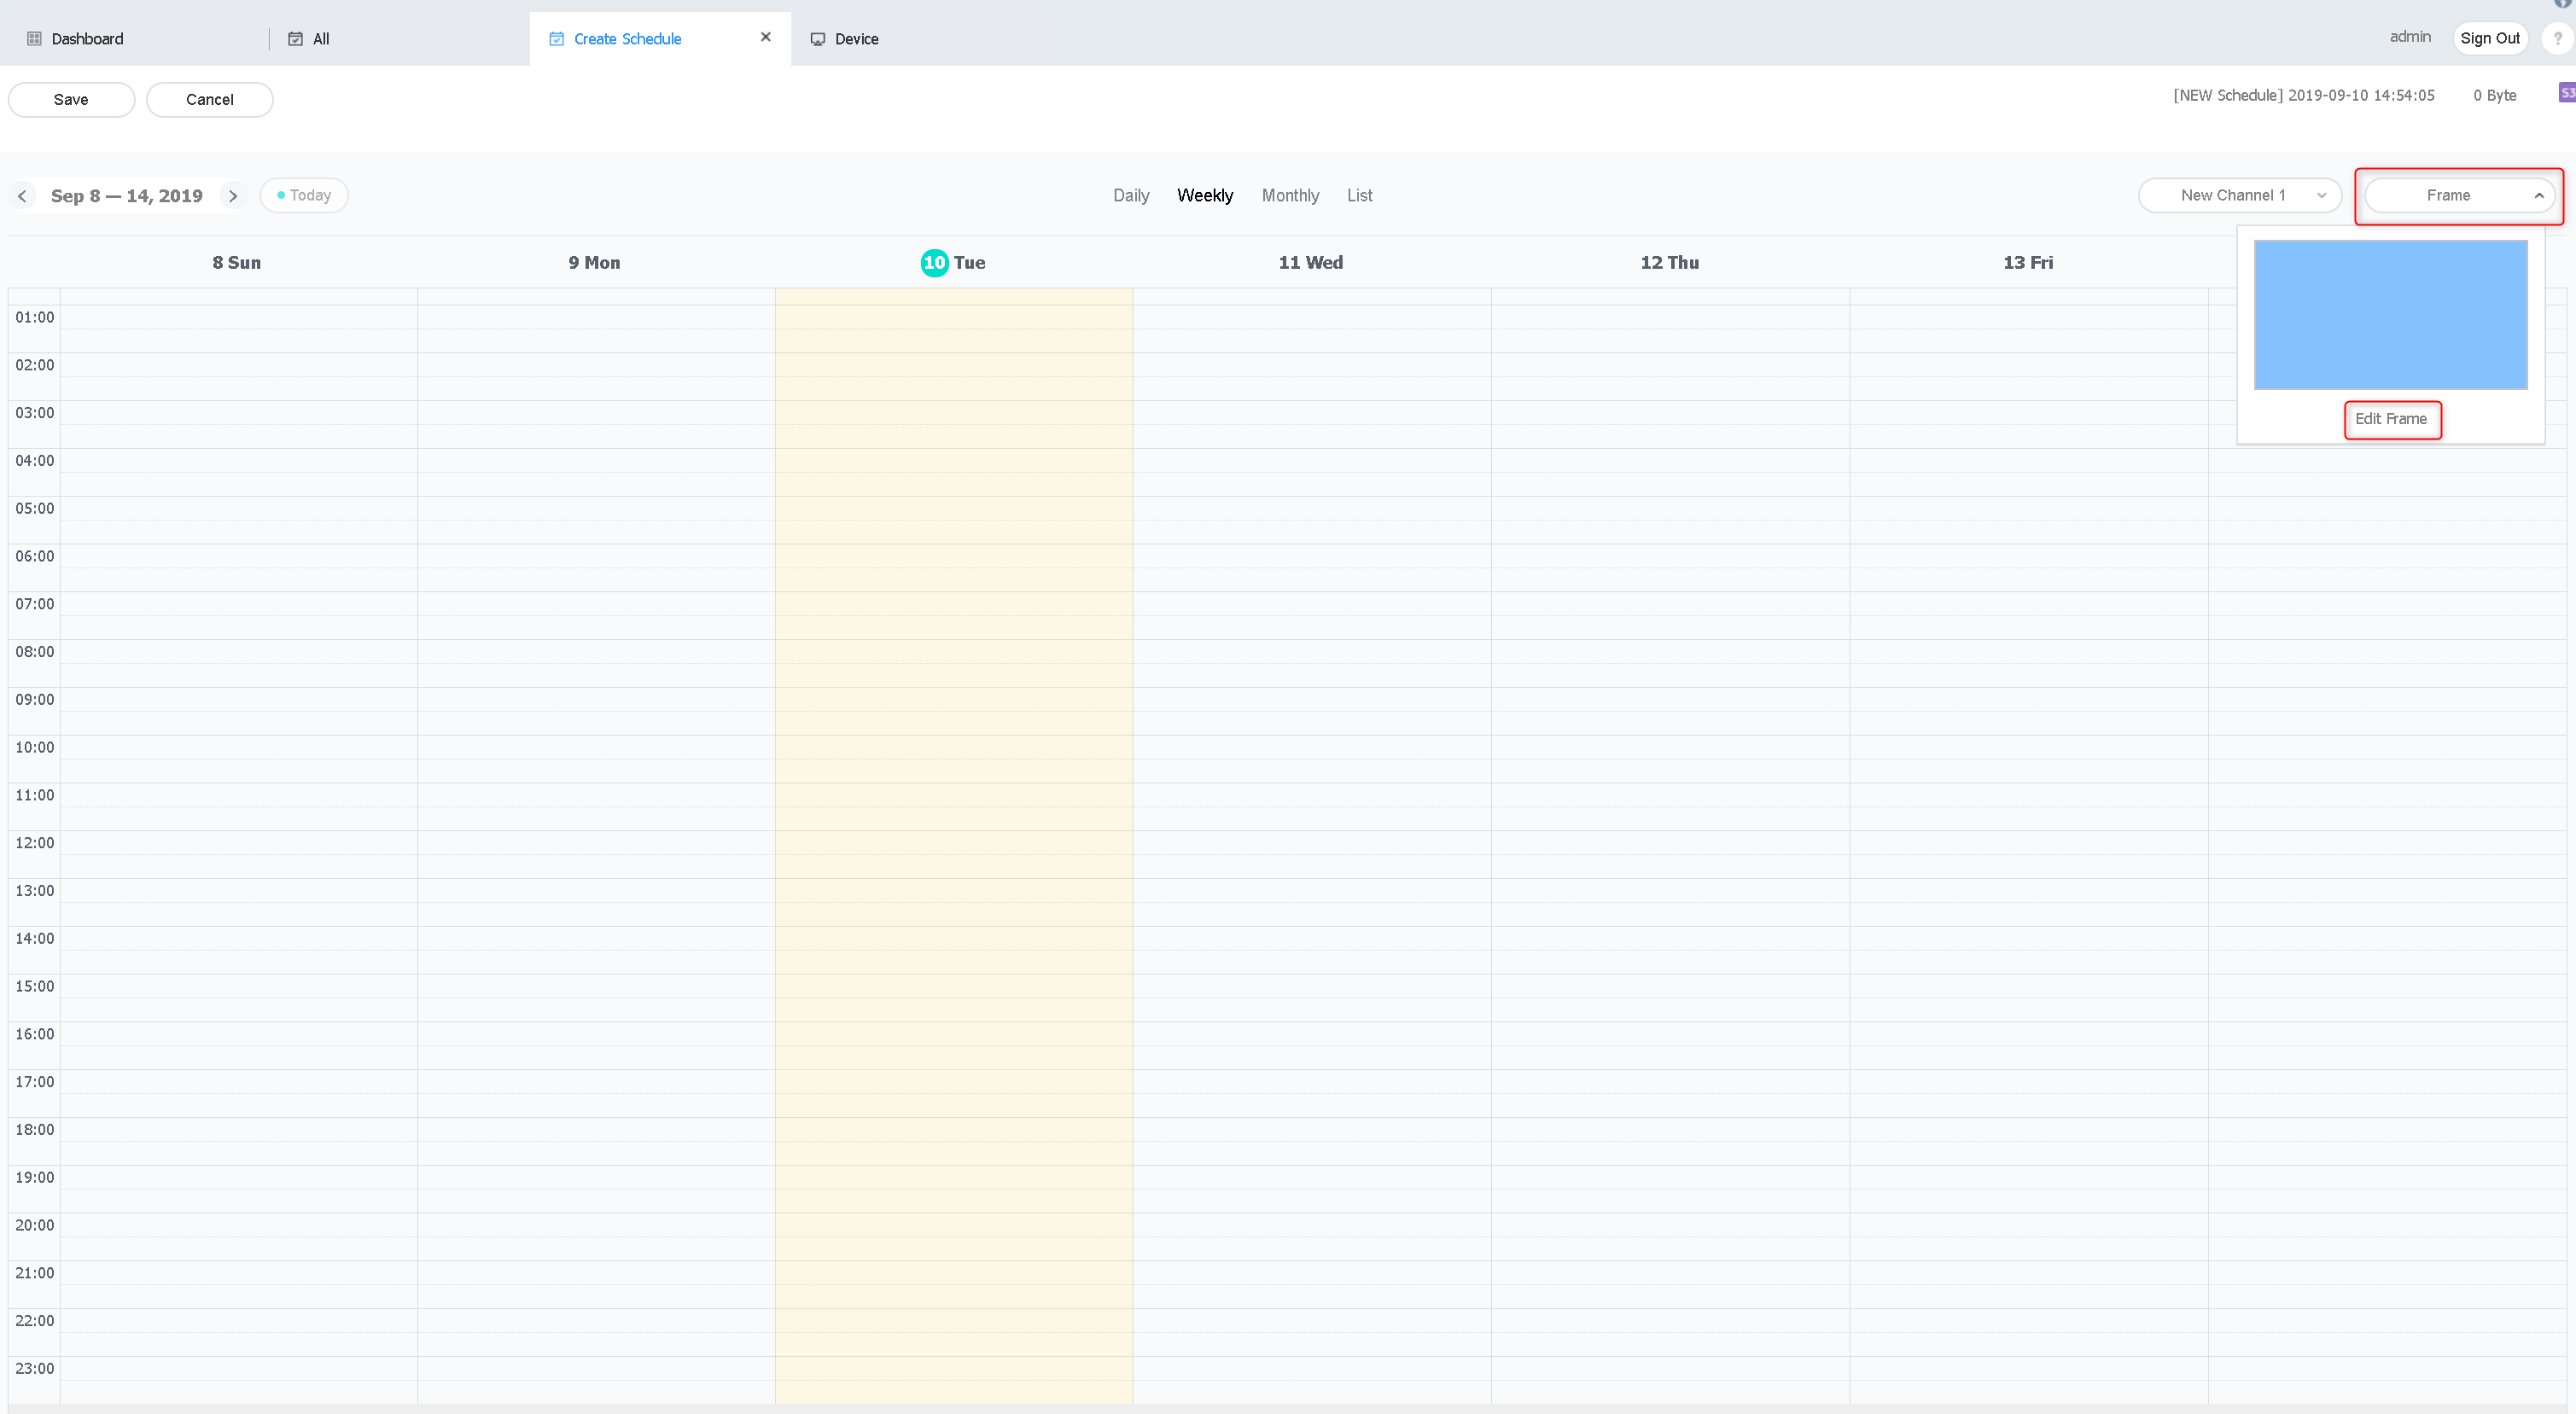
The frame editor opens in a pop-up where you can:
- Adjust the resolution to match your device.
- Draw a custom frame layout, or
- Pick one of the pre-installed frame templates (recommended).
- Click Next.
Configure each frame
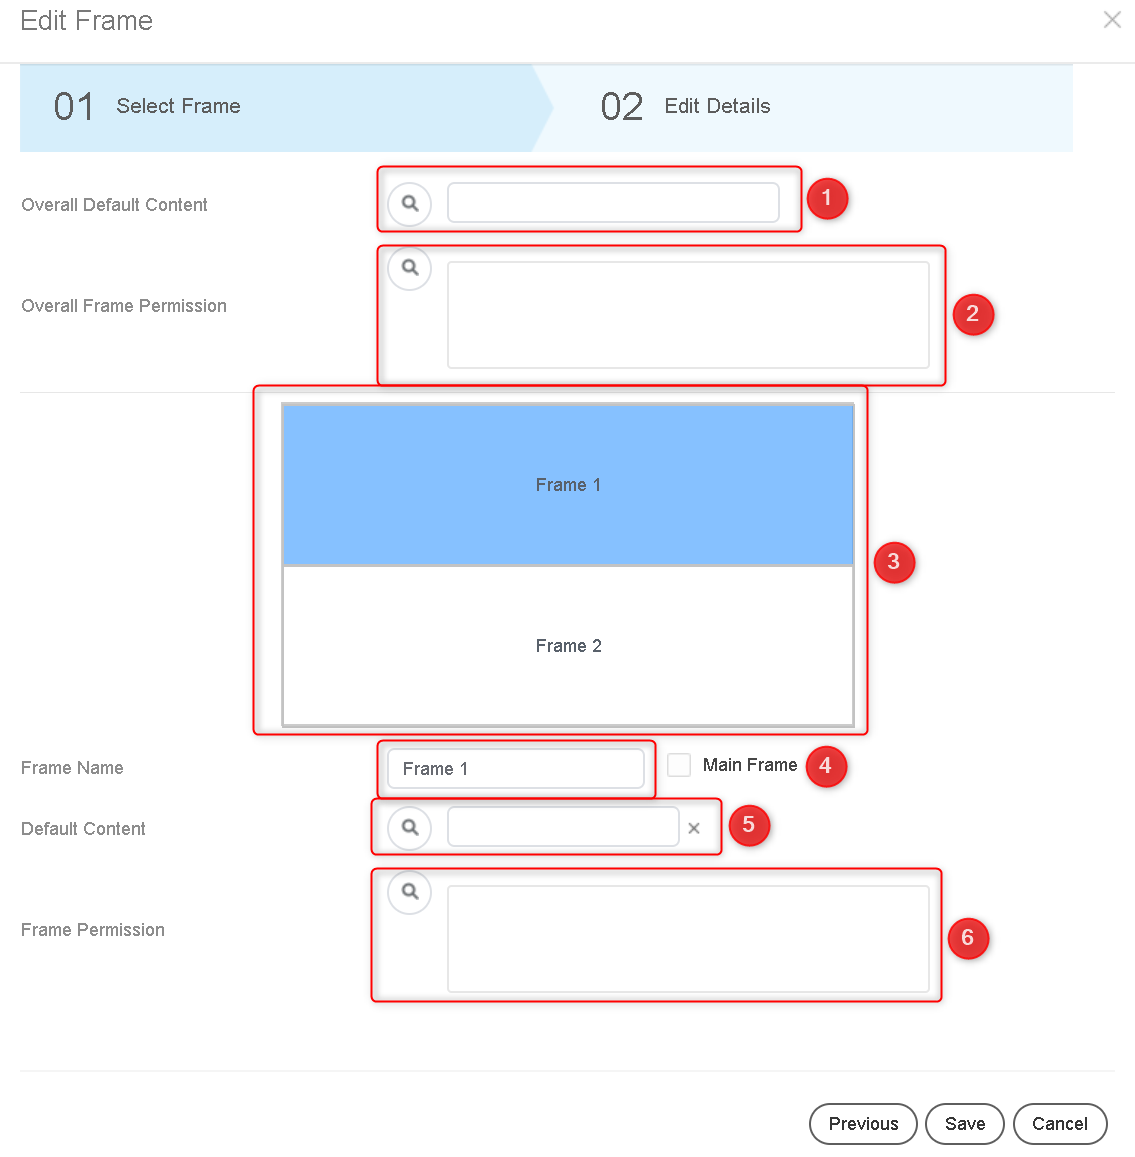
The next screen defines what each frame contains and who may use it:
- Default content for all frames — played in any frame that has no distributed content.
- User group for all frames — the group allowed to use every frame.
- Frame selector — pick an individual frame to configure.
- Frame name — view or rename the selected frame. To make it the main frame, select Main Frame.
- Default content — the content item the selected frame plays by default.
- User group — the group allowed to use the selected frame.
Click Save when all frames are configured.
You can now drag content items into each frame's lane on the schedule agenda and publish the schedule as usual. For the general scheduling and publishing flow, see the media publishing quickstart.