Content Approval
By default, content is available for playlists and schedules as soon as a user uploads it. The content approval workflow adds a review step: a designated administrator must approve each uploaded item before anyone can use it. This helps an organization keep published material accurate, on-brand, and of consistent quality, and it gives content creators clear feedback on what is acceptable.
Enable content approval
An administrator account for the organization is required.
- Log in to MagicINFO Server as the organization administrator.
- Go to Setting > Server Management > Server Settings.
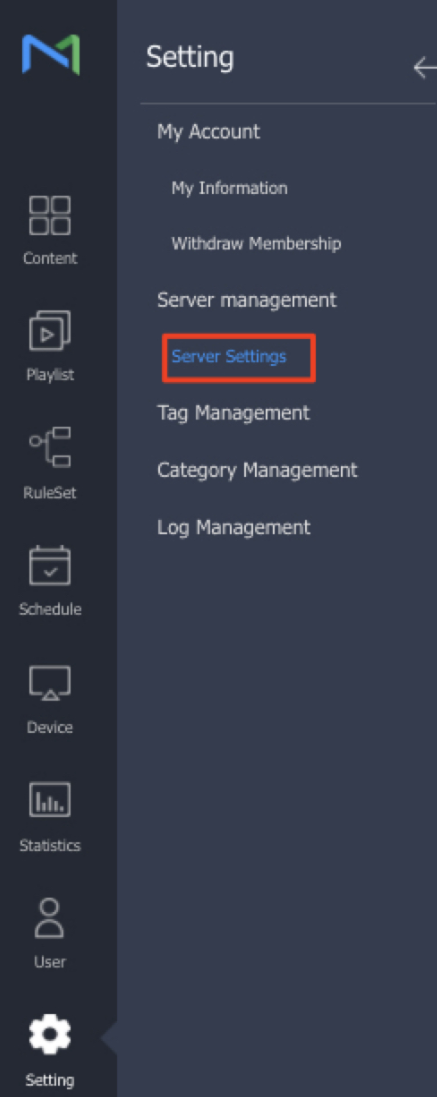
- On the General tab, set Content Approval to Enable.
- Set Approval Type to All Approved.
- In the administrator list, select the administrator who will be responsible for approving content.
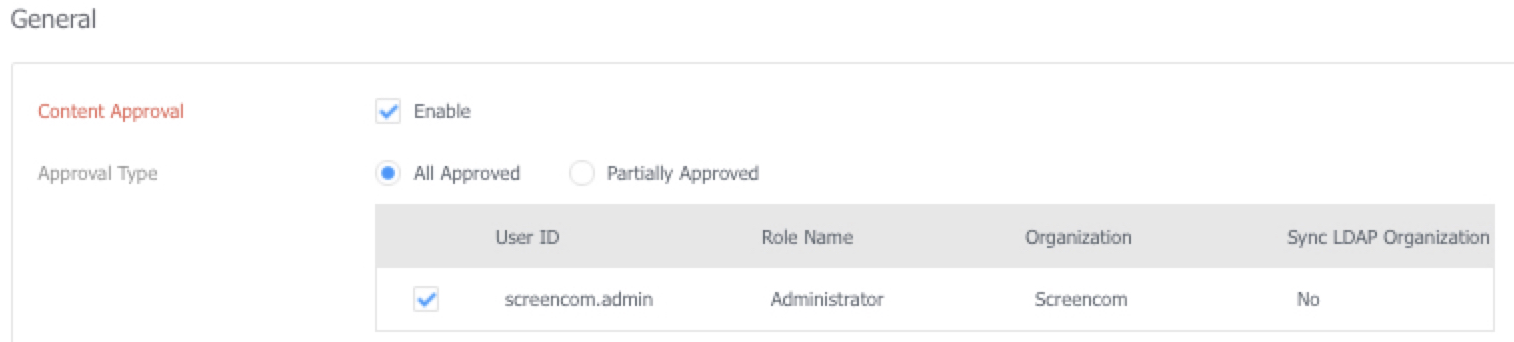
- Save the settings.
Approve uploaded content
Once content approval is enabled, every newly uploaded item waits for review before it becomes usable.
- Go to Content > Unapproved Content to see the items awaiting approval. The badge next to the menu entry shows how many items are pending.
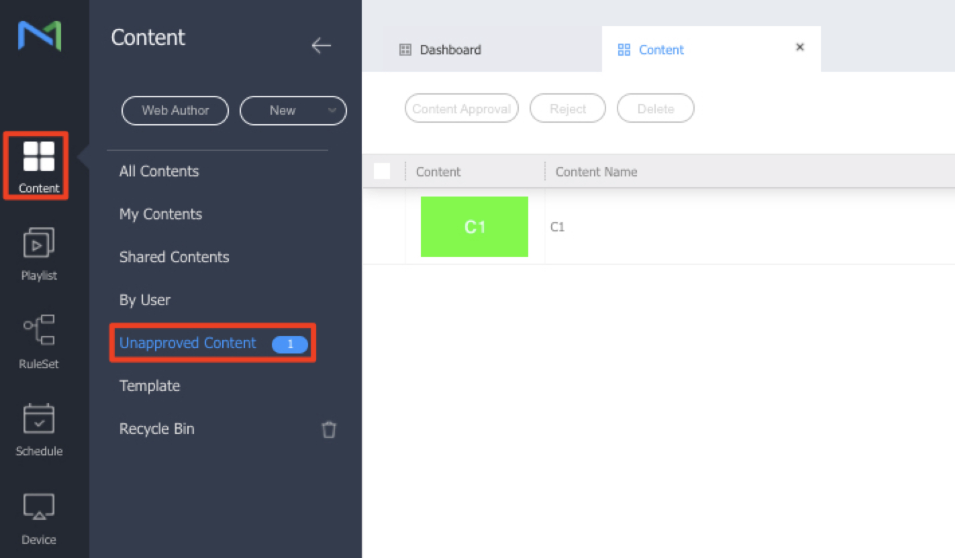
- Select an item and click Content Approval to approve it, or Reject to send it back.
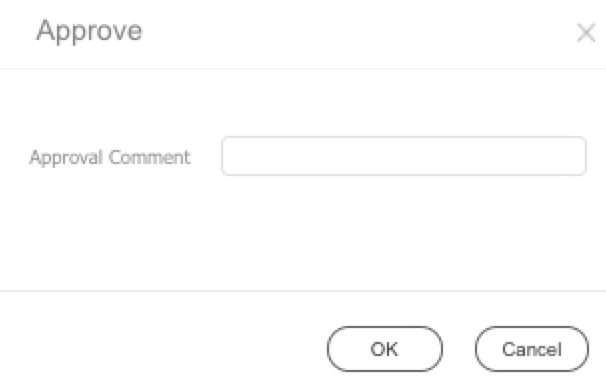
- In the approval dialog, you can add an Approval Comment for reference or feedback, then click OK.
Approved items behave like any other content and can be used in playlists, schedules, and rulesets. For more detail on the approval screens, see Approving content.
Only the administrator designated in Server Settings can approve or reject items. Until an item is approved, other users cannot publish it.