How to Install MagicINFO Server (Quick or Custom)
The MagicINFO Server installer offers two paths. Express Install (the quick path) fills in most settings for you and puts the web application and the database on one computer. Advanced Install (the custom path) lets you choose every value yourself and install only part of the system: FULL (everything on one computer), WAS (the web application only) or DB (the database only). Use WAS and DB when you want the database on a separate machine; see Clustering: Separate Database, WAS and Proxy Servers.
The installer works with PostgreSQL or Microsoft SQL Server. The screens below show PostgreSQL; with SQL Server a few steps differ, as noted.
Before you start
- Sign in to Windows with an administrator account. The installer does not run under a standard user.
- Install the database first. For PostgreSQL, have the administrator password (and the port, if you changed it) that you set when you installed PostgreSQL. For SQL Server, prepare the network and authentication settings described in Choose a Database.
- Check that the PostgreSQL or SQL Server version is supported by the MagicINFO build you are installing. The release notes of each build list it (see Version notes below).
- Decide between HTTP and HTTPS. You can add or change HTTPS later; see Change the HTTPS (TLS) Certificate.
- Open a text file next to the installer. You will need to record passwords and account names as you go.
Steps shared by every installation type
These five screens are the same whichever path you take.
- Choose the installer language and click OK.

- Confirm that you want to continue by clicking Yes.
- Read the welcome text and click Next.
- Accept the license agreement and click Next.
- Choose the installation folder and click Next. The default is
C:\MagicInfo Premium, and most guides on this site assume it.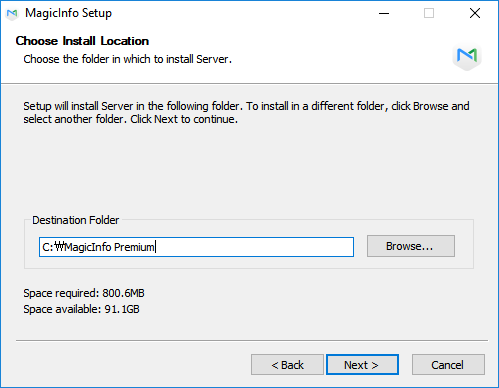
The next screen is where the paths split.
Quick installation (Express Install)
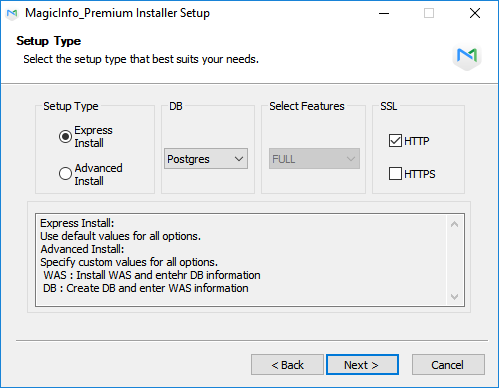
- Set the installation type to Express Install. Choose the database (PostgreSQL or MSSQL) and, under SSL, choose HTTP or HTTPS. One of the two must be selected; it decides whether the server answers on its HTTP port or its HTTPS port. Click Next.
- Type the PostgreSQL administrator password and click Next. With MSSQL this screen is skipped.

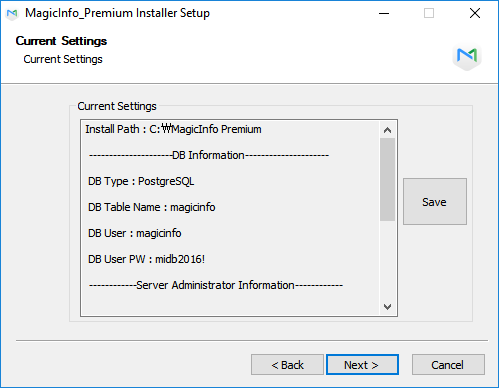
- The installer shows a summary of what it is about to set up. Click Save to store it as a file, then click Next. Express Install creates the general administrator, one organization and that organization's administrator for you, so this summary is where their details appear. Copy them into your notes.
- Continue with Finishing the installation.
Custom installation (Advanced Install)
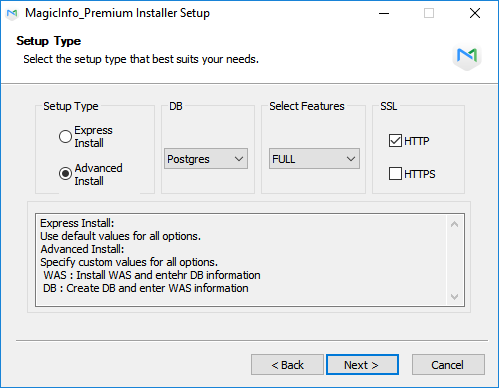
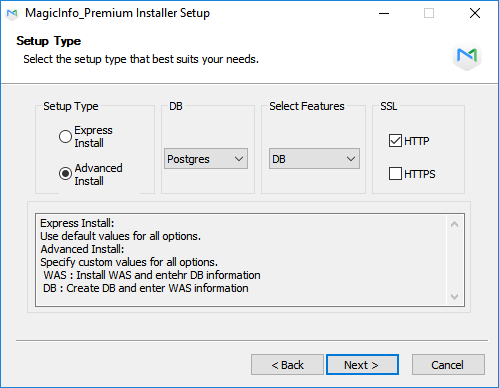
Set the installation type to Advanced Install, pick the feature under Select Features, choose the database and the SSL option (HTTP or HTTPS), and click Next. What follows depends on the feature.
FULL: web application and database on this computer
- Type the PostgreSQL administrator password and click Next (skipped with MSSQL).
- Set the database MagicINFO will create: its name, plus the user ID and password the server will use to connect. Click Next.
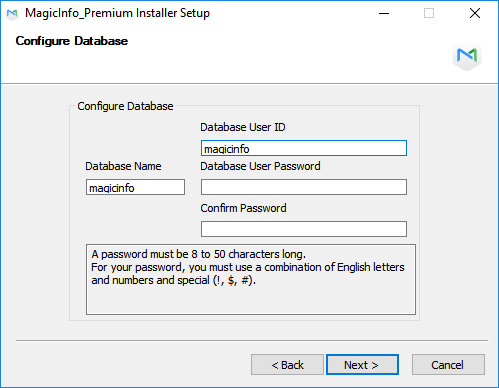
- Fill in the FTP server details and click Next.

- Choose a password for the general administrator. The user ID of this account is always
admin. Click Next.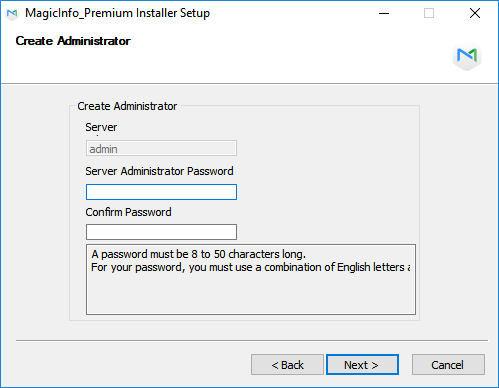
- Name the first organization and enter the details of its administrator. Click Next.
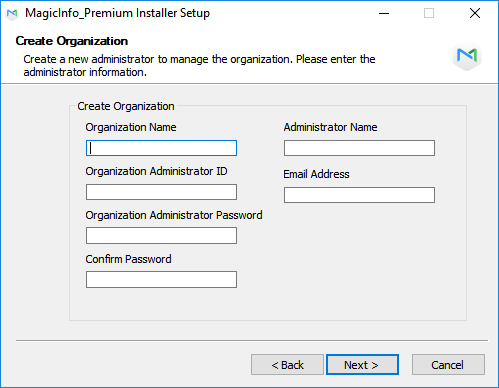
- Decide whether device alarms are sent by e-mail. To turn this on, select Enable and enter the IP address of your SMTP server; mail only works once the SMTP settings are complete. Click Next.

- Click Save on the summary screen to keep a copy, then click Next.
- Continue with Finishing the installation.
WAS: web application only, database elsewhere
Install the DB part first (next section), so there is a database to point at.
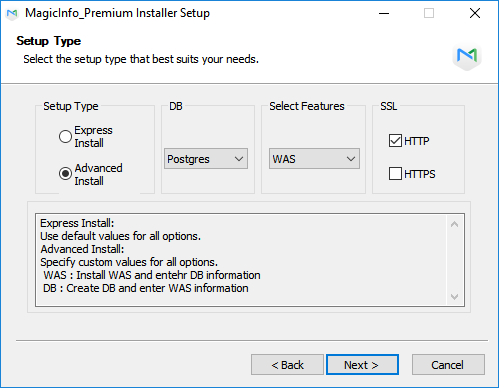
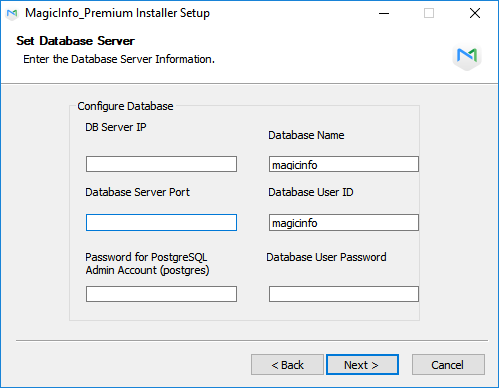
- Enter the address of the database server and the details of the MagicINFO database on it (name, user ID, password). Click Next.
- Fill in the FTP server details and click Next.
- Turn e-mail alarms on or off, as in the FULL path, and click Next.
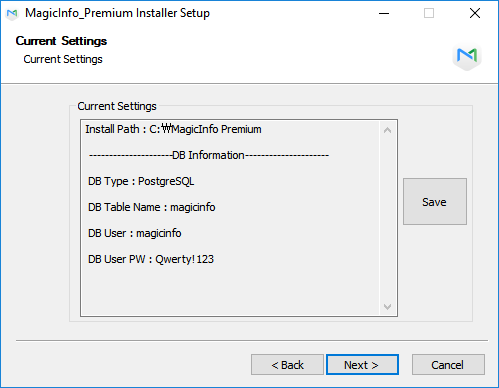
- Click Save on the summary screen, then click Next.
- Continue with Finishing the installation.
DB: database only
- Type the PostgreSQL administrator password and click Next (skipped with MSSQL).
- Set the database name, user ID and password, and click Next. Use the same values later when you install the WAS part.
- Enter the IP address of the computer that will run the web application (WAS) and click Next.

- Choose the general administrator (
admin) password and click Next. - Name the first organization and enter its administrator's details. Click Next.
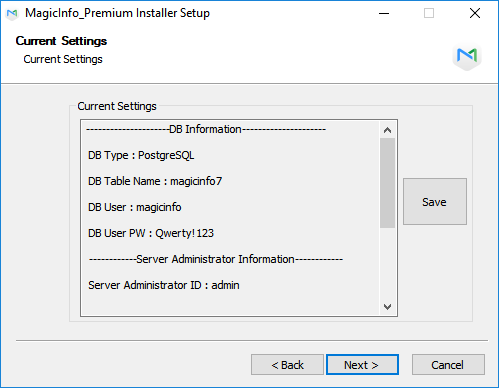
- Click Save on the summary screen, then click Next.
- Continue with Finishing the installation.
Finishing the installation
- Pick a Start Menu folder and click Install.
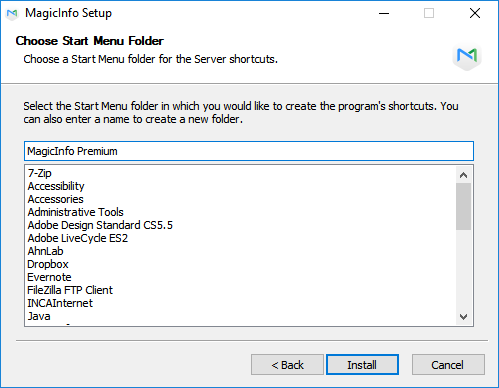
- When the files are copied, click Next.
- Click Finish.

What to write down
Keep these somewhere safe before you close the installer. You need them for sign-in, upgrades and support.
| Item | Why you need it |
|---|---|
| Database user ID and password | Upgrades and backups connect with it. A wrong value here is a common reason an upgrade stops. |
| PostgreSQL administrator password | Backups with pgAdmin and future upgrades. |
General administrator (admin) password | Server-wide settings, licenses, organizations. |
| Organization name and its administrator | Day-to-day users, content and devices live in the organization. |
| HTTP or HTTPS, and the port | The sign-in address and every display's server setting depend on it. |
The difference between the two administrator types is explained in General vs Organization Administrators Explained. Our basic installation guide also notes that the installer keeps an information file in the installation folder.
Sign in for the first time
The server needs several minutes after the installer closes before the web console answers. Then open:
http://<server>:7001/MagicInfo/if you chose HTTP (default port 7001)https://<server>:7002/MagicInfo/if you chose HTTPS (default port 7002)
Use localhost as <server> only in a browser on the server itself; everyone else needs its IP address or DNS name, for example http://192.0.2.10:7001/MagicInfo/. More on the address format: MagicINFO login: find your server's sign-in page.
Most menus stay unavailable until a license is active. That is the next step: Activate a MagicINFO Server License. After that, change any passwords you do not want to keep and start connecting displays.
Common install problems
The installer will not accept the PostgreSQL password. It wants the password of the PostgreSQL administrator account you set when installing PostgreSQL, not a MagicINFO password. If it is lost, reset it in PostgreSQL before running the MagicINFO installer again.
The sign-in page does not open right after installing. Wait a few minutes; the server is still starting. Then test whether MagicINFO answers at all by opening http://<server>:7001/MagicInfo/openapi/auth?cmd=isMagicInfo (or the https / 7002 form). A short version number means the server is fine and the problem is the address, the browser or a firewall. See MagicINFO ports explained.
Works on the server, not from other computers. Allow the MagicINFO port inbound on the Windows firewall of the server and on any firewall in between.
"This site can't be reached" on an http:// address that used to work. MagicINFO tells browsers to use HTTPS only (an HSTS header) for a year. Once a browser has opened the server by name over HTTPS, it refuses plain HTTP to that name, while other tools still connect. Use HTTPS consistently, or clear the stored policy for that name in the browser (chrome://net-internals/#hsts or edge://net-internals/#hsts).
HTTPS shows a certificate warning. A fresh HTTPS install uses a certificate the browser does not trust. Replace it with your own: Change the HTTPS (TLS) Certificate.
The WAS install cannot reach the database. Check the database server's address and port, that its firewall allows the WAS computer, and that the user ID and password match what you set during the DB install.
Version notes
- Build 21.1070 ships Tomcat 9.0.10x with Zulu OpenJDK 8.
- Build 21.1092.3 moved to Tomcat 9.0.115 and added support for PostgreSQL 18 and Microsoft SQL Server 2022 and 2025, according to Samsung's release notes. Upgrading an existing PostgreSQL-based server to that build needs PostgreSQL 15.x; see Before You Upgrade.
- Always read the release notes of the exact build you install for its supported database versions.
Checked against MagicINFO Server 9 (builds 21.1070 to 21.1092.3), October 2026.