Create an Advertisement Schedule
MagicINFO Server offers an ad scheduling option that maps multiple playlists to devices. Play content in the playlists at a specific time on a specific date.
For details on creating ad playlists, see Creating ad playlists.
- Click New Schedule > Content.
- Use the Create Schedule window to configure basic schedule settings and click Create.
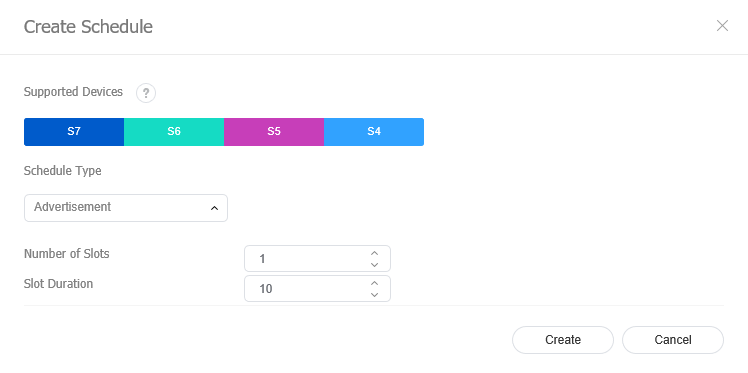
| Item | Description |
|---|
| Supported Devices | Select a device type to which to distribute the schedule. - Ad schedules can be created when I Player is selected. - Higher-performance devices than the selected device are automatically included in the selection. For example, if you select S2 Player, higher versions, such as S3 Player, I Player, are automatically selected. - Supported Devices only displays device types for the devices that have currently licenses registered on MagicINFO Server. |
| Schedule Type | Specify a playback mode. Select Advertisement. The options available under Schedule Type vary depending on the selected device types. |
| Number of Slots | Set the number of ad slots. |
| Slot Duration | Set playback duration for each slot. |
- Add ads to the schedule, using one of the following options:
- Option 1: Click and drag a playlist from the list of playlists to the slot schedule table. Click the added playlist.
- Option 2: In the slot schedule table, click or drag a time slot to which to add a playlist.
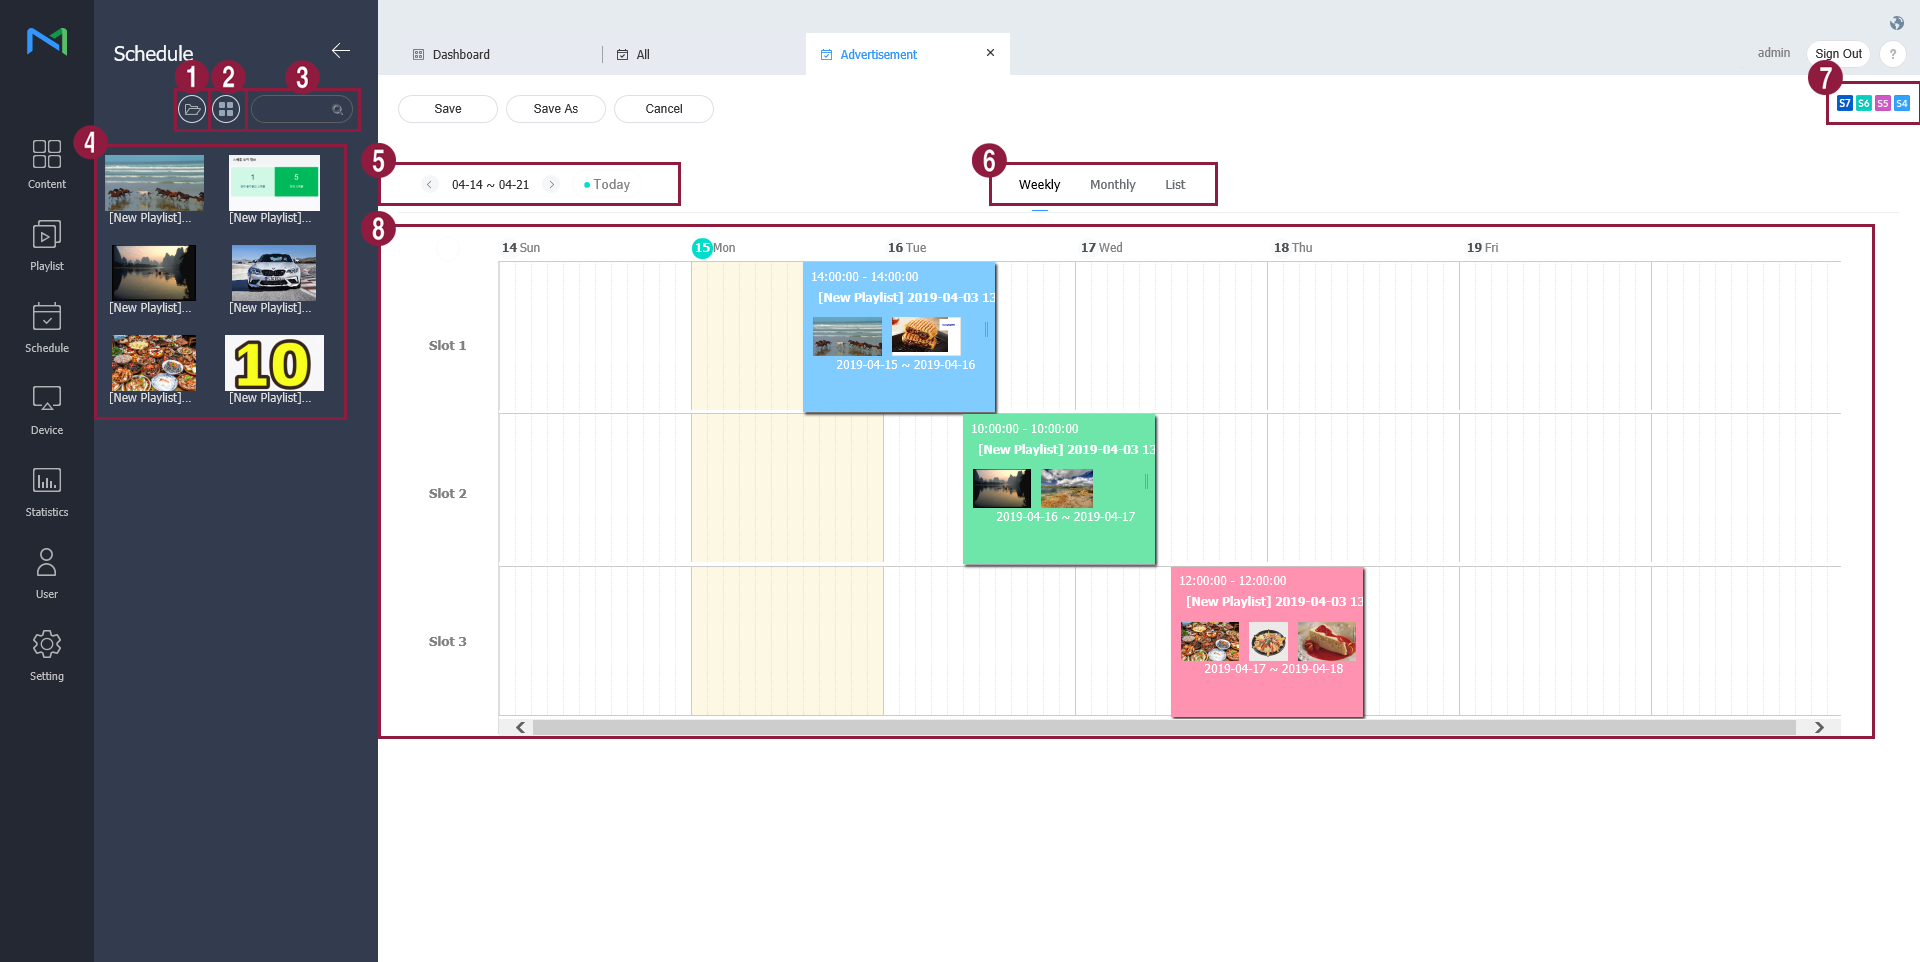
- View playlists under a specific group.
- Select the desired file types, user IDs, tags, and file sizes. Only files that match the selected conditions appear on the screen.
- Sort playlists by using thumbnail or list view mode.
- Search playlists by name.
- Ad playlists are shown.
- Select a date to which to assign the schedule.
- Specify the time unit of a timetable to assign the schedule to.
- Weekly: View a weekly timetable.
- Monthly: View a monthly timetable.
- List: Display slots currently in use.
- View device types to which to distribute the schedule.
- This is the slot schedule table. Drag a playlist, or click or drag a time slot.
- Configure specific ad settings and click Save.
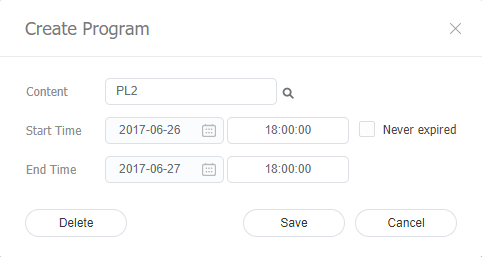
| Item | Description |
|---|
| Content | Select or change an ad playlist to distribute to devices. |
| Start Time | Set the time to start the ad playlist playback. |
| End Time | Set the time to end the ad playlist playback. - To repeat playback of the playlist continuously, select Never expired. |
- After configuring the required schedule settings, click Save.
- When the content distribution settings window appears, input distribution information and click Save & Publish. Click More Options to view additional settings.
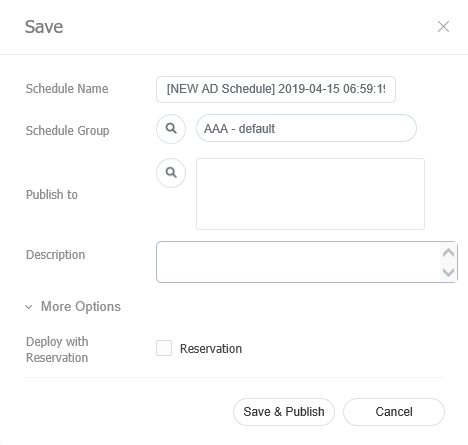
| Item | Description |
|---|
| Schedule Name | Enter a schedule name. A single schedule name cannot be used more than once. |
| Schedule Group | Select a group for the schedule. |
| Publish to | Click  to select a device group to which to distribute the schedule. Devices can be selected by the group. It is not possible to select individual devices. |
| Description | Enter a description of the schedule. |
| Deploy with Reservation | Select the Reservation checkbox to distribute the schedule at a specific time. All requests for schedule changes are saved up until the specified distribution time. These changes are applied all at once when the schedule is distributed. |